By D. Vigneault Beery | STC Member
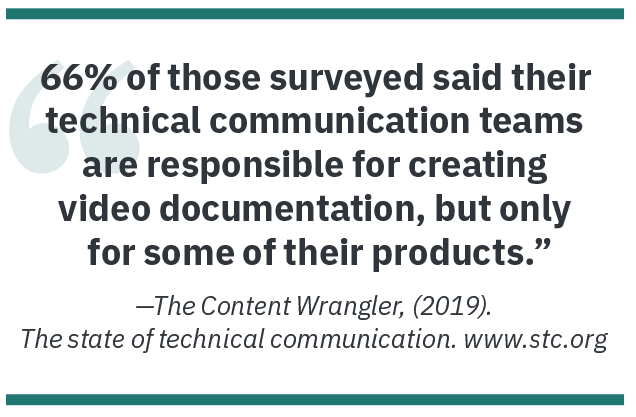
The creation of video content has become an important and increasing trend. Companies are starting to examine the potential return on investment for tutorials for product usage, FAQs and updates, as well as for demonstrations and new product launches. According to The Content Wrangler in “The state of technical communication” (2019), the trend for video documentation is positive.
Whether you are interested in producing videos or interested in convincing your supervisor to let you produce videos, there are some basic things you should know about lighting that will both bolster your position and improve your product.
Just as the use of italics, bold, underlining, caps, font size, font choice, color, and formatting adds emphasis in written documentation, so lighting becomes your tool for adding emphasis in video production. And as the saying goes, a picture is worth a thousand words. Visuals amplify the impact of text, even text written on a screen or spoken as a voice-over.
Everyone has seen poorly produced videos that obscure the product or the spokesperson, and clicking away is the easiest action to take. No company wants a poor image of their products or to lose that set of eyeballs. Poor lighting is one of the most noticeable problems with video production, but it’s also the easiest to avoid.
Lighting was once a very involved process that often required specialized and expensive equipment. Technological advances and prosumer products have lowered the prices significantly, allowing good lighting equipment to be affordably acquired as you can see if you research video blogging (VLOGS) setups. Although that is good gear, it isn’t the right gear for shooting products or processes.
This article will discuss the basic concept of three-point lighting, providing a few tips for “cheating” the process along the way, and then we’ll examine some lighting options currently available. The key here is that the eye is amazing in its ability to ignore shadows if the context and the primary subject or object are clear, and we can make sure it’s clear before we ever hit the record button.
Planning Your Equipment Needs
Just as you keep in mind the audience for your documentation, you must keep in mind the content you need to capture as you plan your project. Even the best three-point lighting scheme might not be terribly practical if you have to follow a process, show the use of a product, or work in a very tight space.
If you’re following a process in motion or showing the use of a product, you will probably be limited to two-point lighting, assuming the use of some spring clips or a bounce card. However, in particularly tight spaces, you may be limited to a single light source placed as close to the camera as possible. This is easily done if you are using a product like the SmallRig.
Tip: When working in tight spaces, you may be able to attach some additional lights to nearby structures with spring clips.
Spring Clips
This 12-pack from Romeda is a very handy addition to your production toolbox for just $7.68.
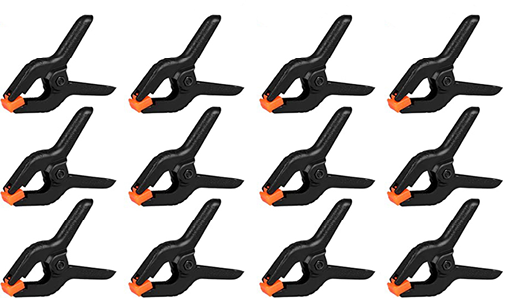
Source: www.amazon.com
Tip: If you are absolutely stuck in a situation that only allows the use of one light source, consider using a bounce card to mitigate harsh shadows coming from your Primary light. Flexible bounce cards can fit in almost anywhere.
Bounce Cards
One fairly cheap option for bounce cards includes the MEIDI 2 piece foldable car window sunshield, (Size 28 x 31 inches) which comes with a carrying case for $15.99.
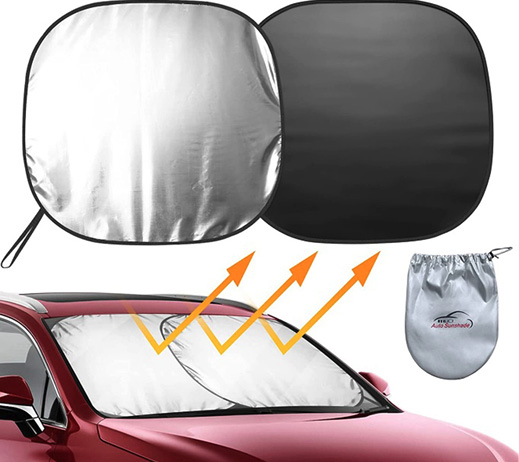
Source: www.amazon.com
Eliminating Ambient Light Sources
This may sound counter intuitive, but to the degree you can manage it, you should eliminate overhead fluorescent lighting and direct sunlight. If it’s impossible to block out sunlight with the use of shades or by taping something over them, try incorporating it as your primary or secondary light source. Fluorescent lights often change their color temperature and can have a cyclic flicker that your eyes don’t notice, but the camera frequently does. While these don’t always ruin a recording, the results are usually undesirable once you review your footage.
Practice Makes Perfect
Practicing with your lighting setup in advance and viewing the results from different angles is a good idea and viewing the “location” of your shoot can help you to plan your lighting setup ahead of time. This can be the most time-consuming part of the video process, but it will assure you achieve the strongest end results.
The Three-Point Lighting Methodology
When you begin to work with the techniques for proper lighting, you are harkening back to the methods of Hollywood, but don’t be intimidated as these concepts are easily understood and can become second nature with frequent use. We’ll start very basically with single-point lighting.
1 Point Lighting
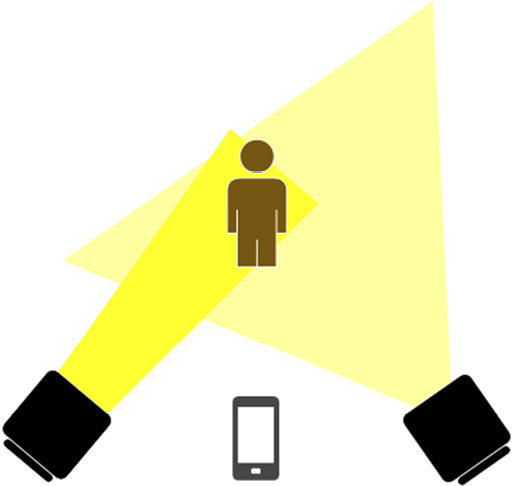
The first light you use is called the Primary or Key Light. It provides the light for the subject or object of your project.
Place the Key Light at an angle approximately 45 degrees (or less) to one side of the camera. focused on the subject or object.
If you can dim or focus this light source, it should be turned up and tightened in.
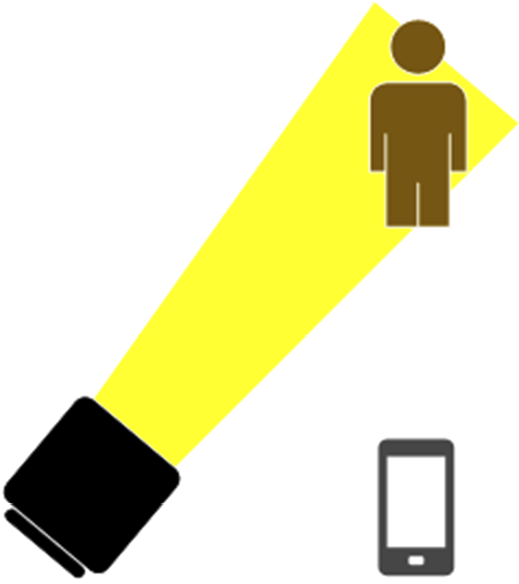
Source: K. Beery
2 Point Lighting
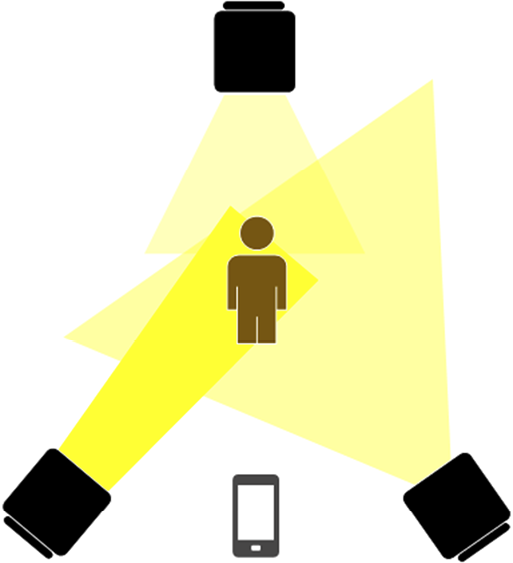
The second light you add is called a Fill Light because it is used it to fill in the shadows created by the Key Light. Additionally, it provides some broad lighting for the rest of the area. The Fill Light should be set at the opposite angle from the Key Light and should not be as powerful as the Key Light.
If you can dim or focus this light source, it should be turned down a bit and widened out.
Source: K. Beery
Tip: The Fill Light can be made to appear weaker than the Key Light by moving the Fill Light further away from the subject or object.
3 Point Lighting
The final light in the three-point lighting scheme is called the Back Light, it goes above and behind the subject or object to provide separation from the background.
While it doesn’t sound like it makes a lot of difference, it actually helps the eye to distinguish three dimensions within a two-dimensional media which makes perception more natural for the brain.
If you can dim or focus this light source, it should be turned way down and widened out.
Source: K. Beery
Tip: If this light is on a tripod, move it off to the side to keep it out of your shot.
Affordable & Portable Light Kits
This brings us to some currently available products for you to consider as you move forward.
Buying lights individually does not have to be expensive, however you will need to sort through many varieties and brands which may or may not come with tripods and carrying cases so you’ll really need to do your research here.
One brand is the SVOPY dimmable LED video light kit with adjustable tripod for $25.99. Three of these is still not an unreasonable investment to ensure a quality outcome.
Tip: Sandbags for tall tripod setups can be made easily and cheaply at home by filling a soft bag with sand or rocks and placing it over the legs of the tripod once it’s set up. All you need is enough weight to keep the light from falling over if someone bumps into it.
Source: www.amazon.com
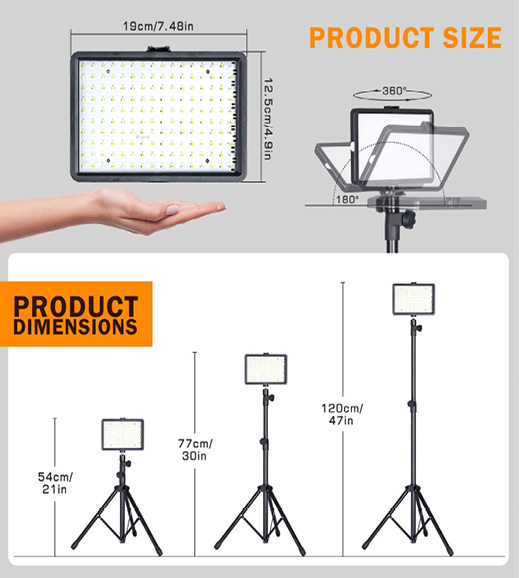
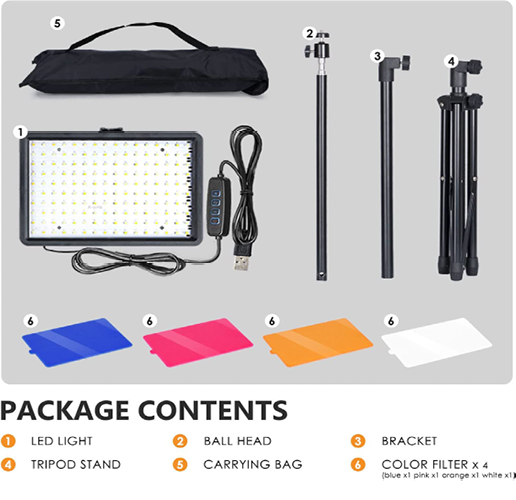
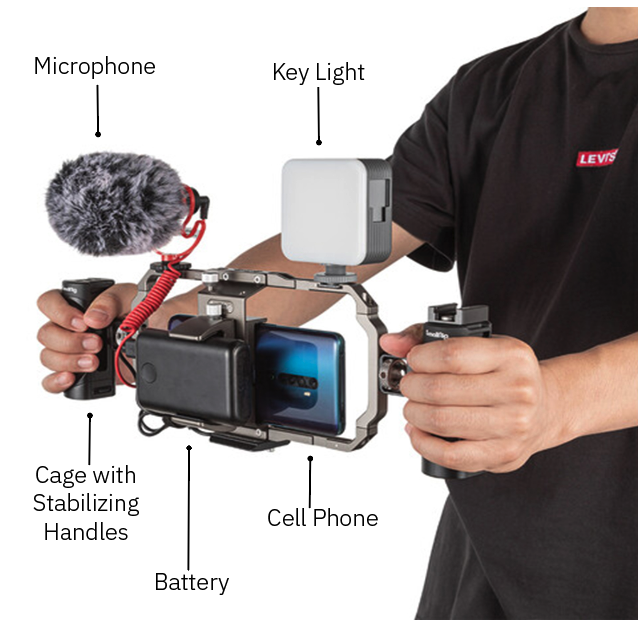
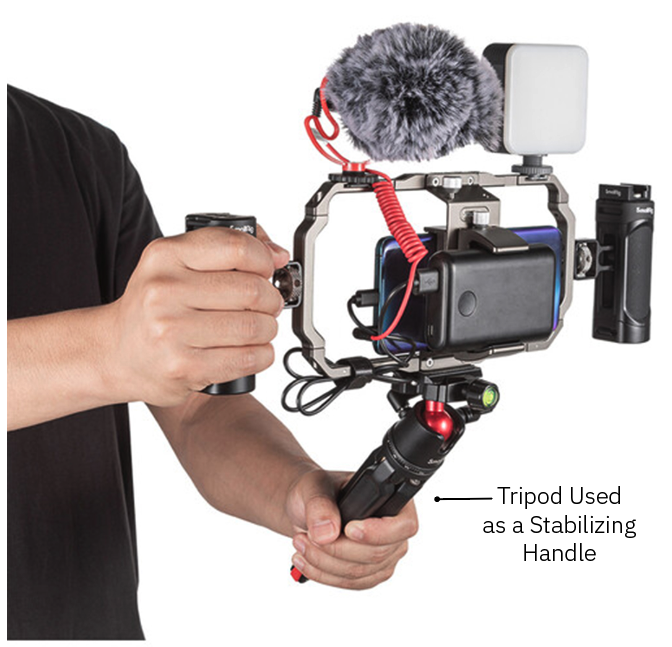
My lighting preference is the SmallRig All-in-One Smartphone Mobile Video Kit which I used in the 2022 STC Annual Summit workshop I taught. I use it as my Primary or Key Light and it costs $169.00.
Caution: Anytime you use lights, you should have sandbags for safety.
Caution: Lights on tripods get very hot and can be tricky to move, always wear work gloves to protect your hands when adjusting them.
Caution: Always allow lights to completely cool down before disassembling them and packing them away.

Source: www.bhphotovideo.com
Conclusion
Video content is here to stay. It’s the preferred method for acquiring product information for people of all ages, and as companies come to see the return on investment on creating their own content, and the diminished cost of the equipment, you will be perfectly placed to show your expertise in this area. You can develop this skill by starting small; experiment now before you buy any additional equipment by using your cell phone and a lamp to light an object on your kitchen table; and see what you get. Go crazy and use two or three lights; and see what you get. Most importantly, have some fun with it!
References
- Able, Scott. “The Future of Tech Comm: The state of technical communication.” Roundtable. Society for Technical Communication. March 2019. https://www.stc.org/roundtable/future-of-tech-comm/#1551822533569-c4c8b521-6c15.
- Amazon. “Romeda Spring Clamps.” Accessed March 27, 2023, https://www.amazon.com.
- Amazon. “2 piece Collapsible Automotive Sun Shade.” Accessed March 27, 2023, https://www.amazon.com.
- Amazon. “Portable Light Kit.” Accessed March 27, 2023, http://www.amazon.com.
- BH Photo Video. “SmallRig Video Kit.” Accessed March 27, 2023, http://www.bhphotovideo.com.
D. Vigneault Beery, MA, CPTC, (dbeery@msudenver.edu) has been teaching technical communication in Denver, Colorado, since 2010. She has served the Rocky Mountain Chapter in various leadership roles and engages DEI initiatives and grant applications with her technical editing skills.